US Dollars
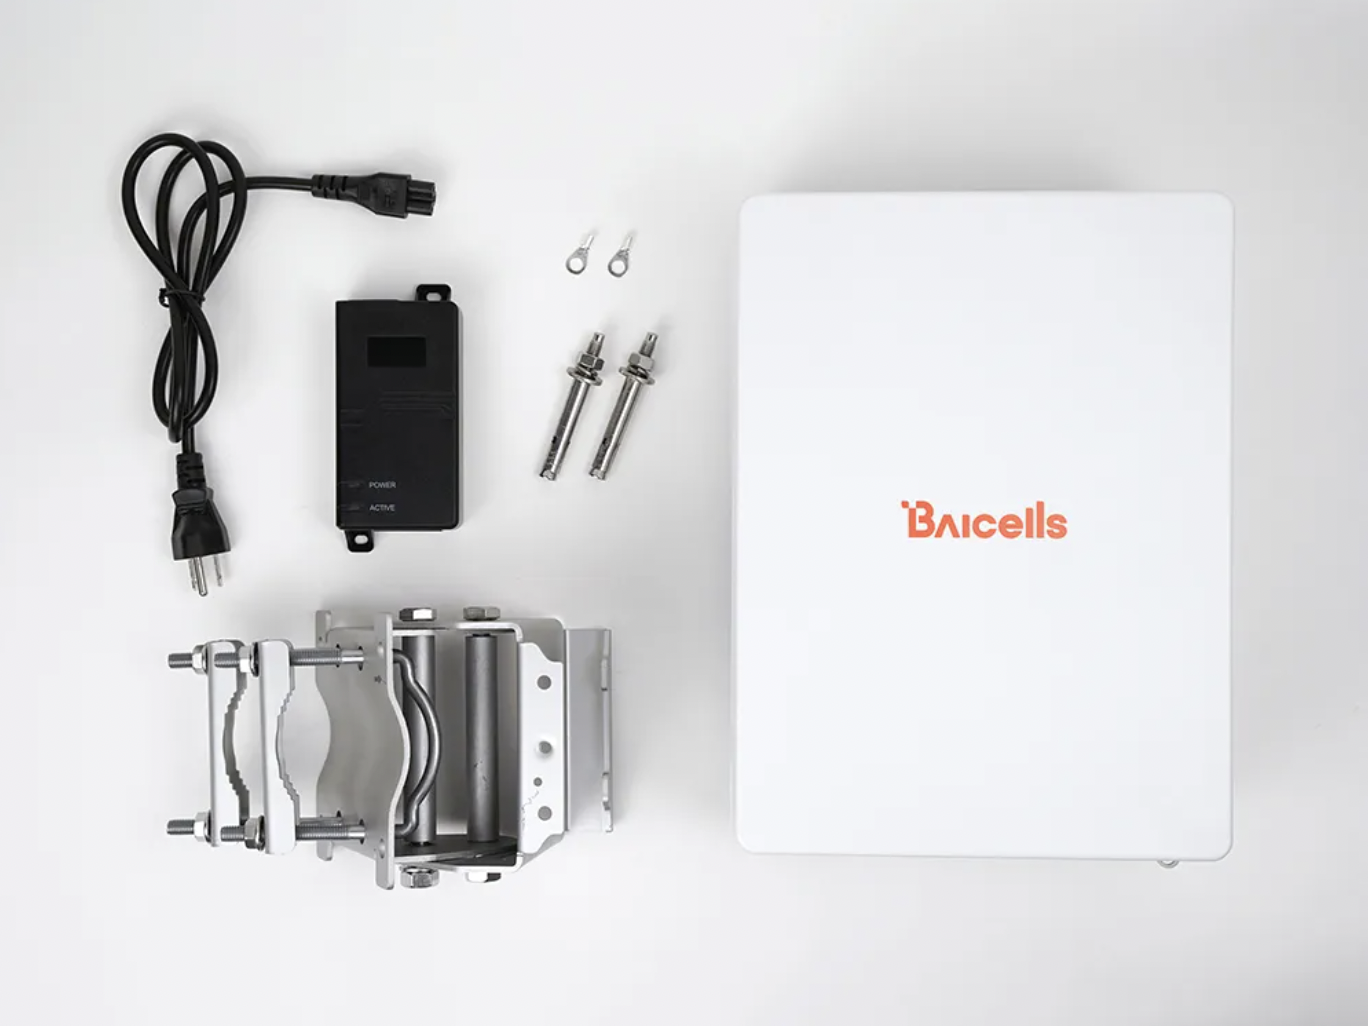
Baicells Nova 430H Setup Guide

* Pre-requisites:
- FreedomFi gateway is set up and running.
- FreedomFi software is updated to 1.9.0 or later.
Do not install the Outdoor Small Cell before following this guide. It is highly recommended that the initial setup is done before installing the Outdoor Small Cell outside. This will prevent any headaches if there are any issues with the initial setup.
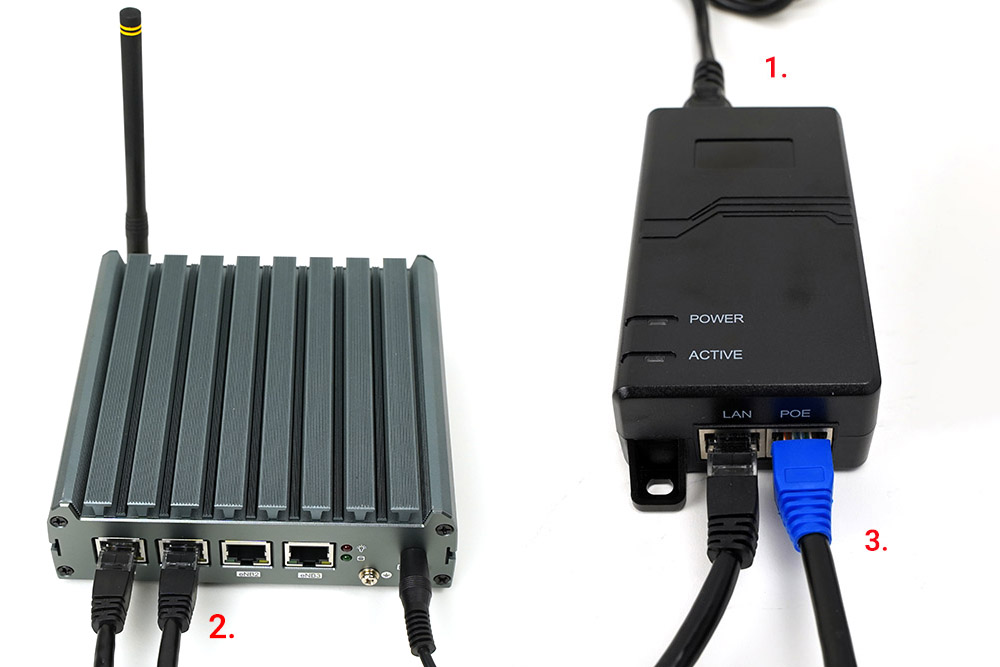
Step 1 - PoE+ Injector
- 1. Connect the power cable to the PoE+ Injector and into a wall socket
-
-
It is not recommended to power the Baicell via daisy-chain. Make sure you are powering the device with its own wall socket.
-
2. Connect an ethernet cable between the “LAN” port of the PoE+ Injector and the “eNB1” port of the FreedomFi Gateway.
3. Connect an outdoor rated ethernet cable to the “POE” port of the PoE+ Injector
-
-
Outdoor rated ethernet cable is required as this will be the only cable that is routed outside to where the Outdoor small cell will be installed.
-
-
-
Ethernet cable must be 330ft / 100m or less in total length.
-
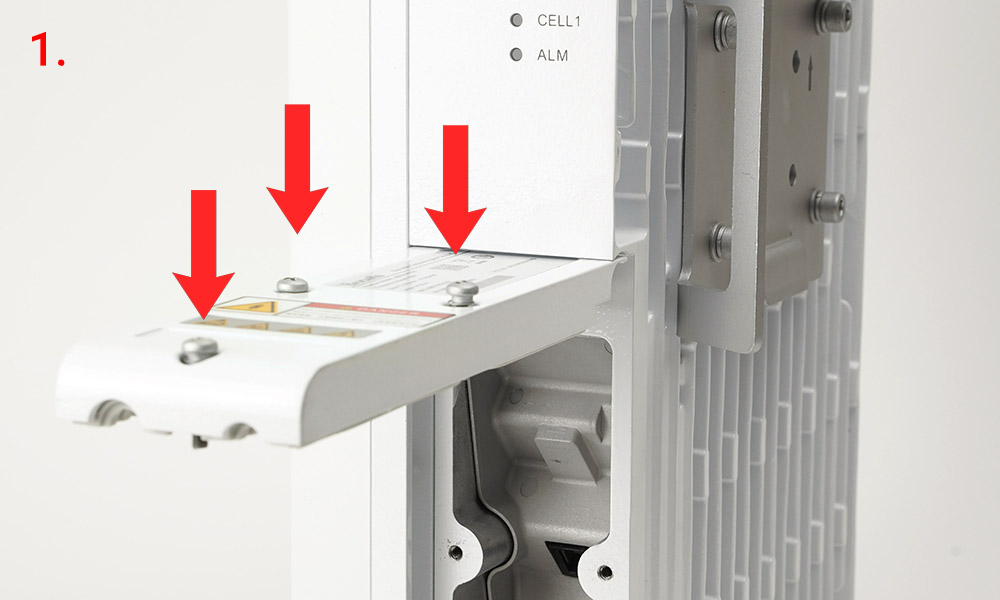
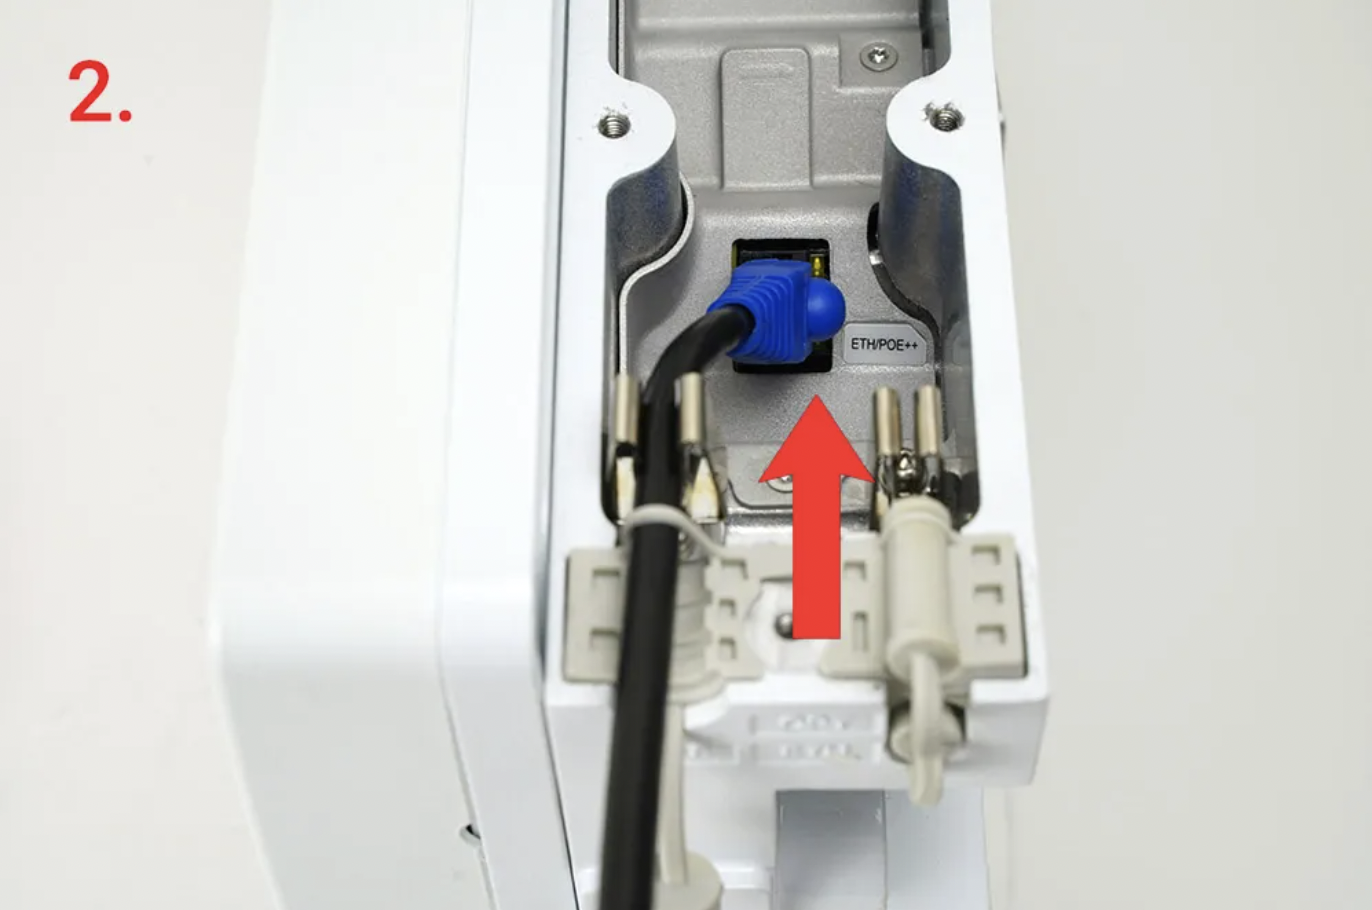
Step 2 - Connecting the Outdoor Small Cell
- Unscrew the 3 screws on the side of the Outdoor Small Cell to open the waterproof door.
- Connect the other end of the outdoor rated ethernet cable (“POE” port of the PoE+ Injector) to the port labeled “ETHPOE+” in the Outdoor Small Cell
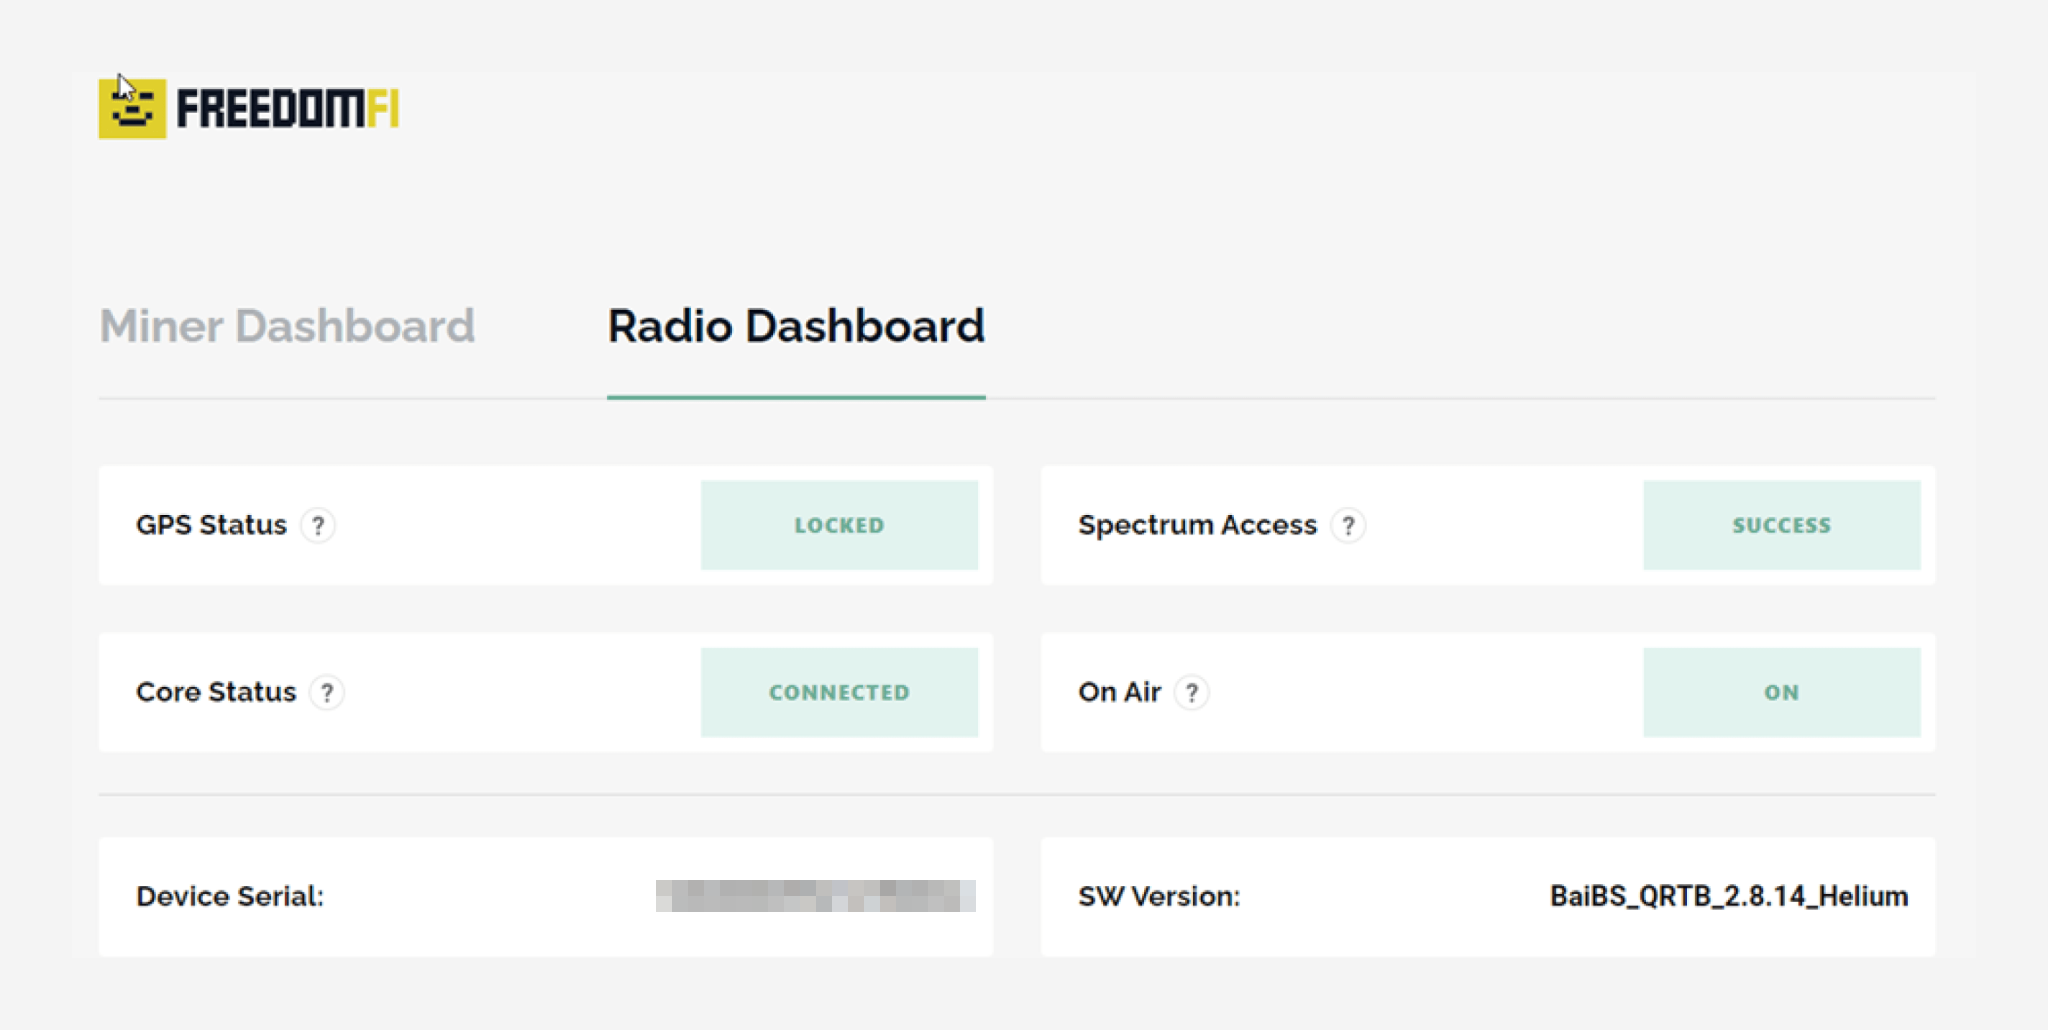
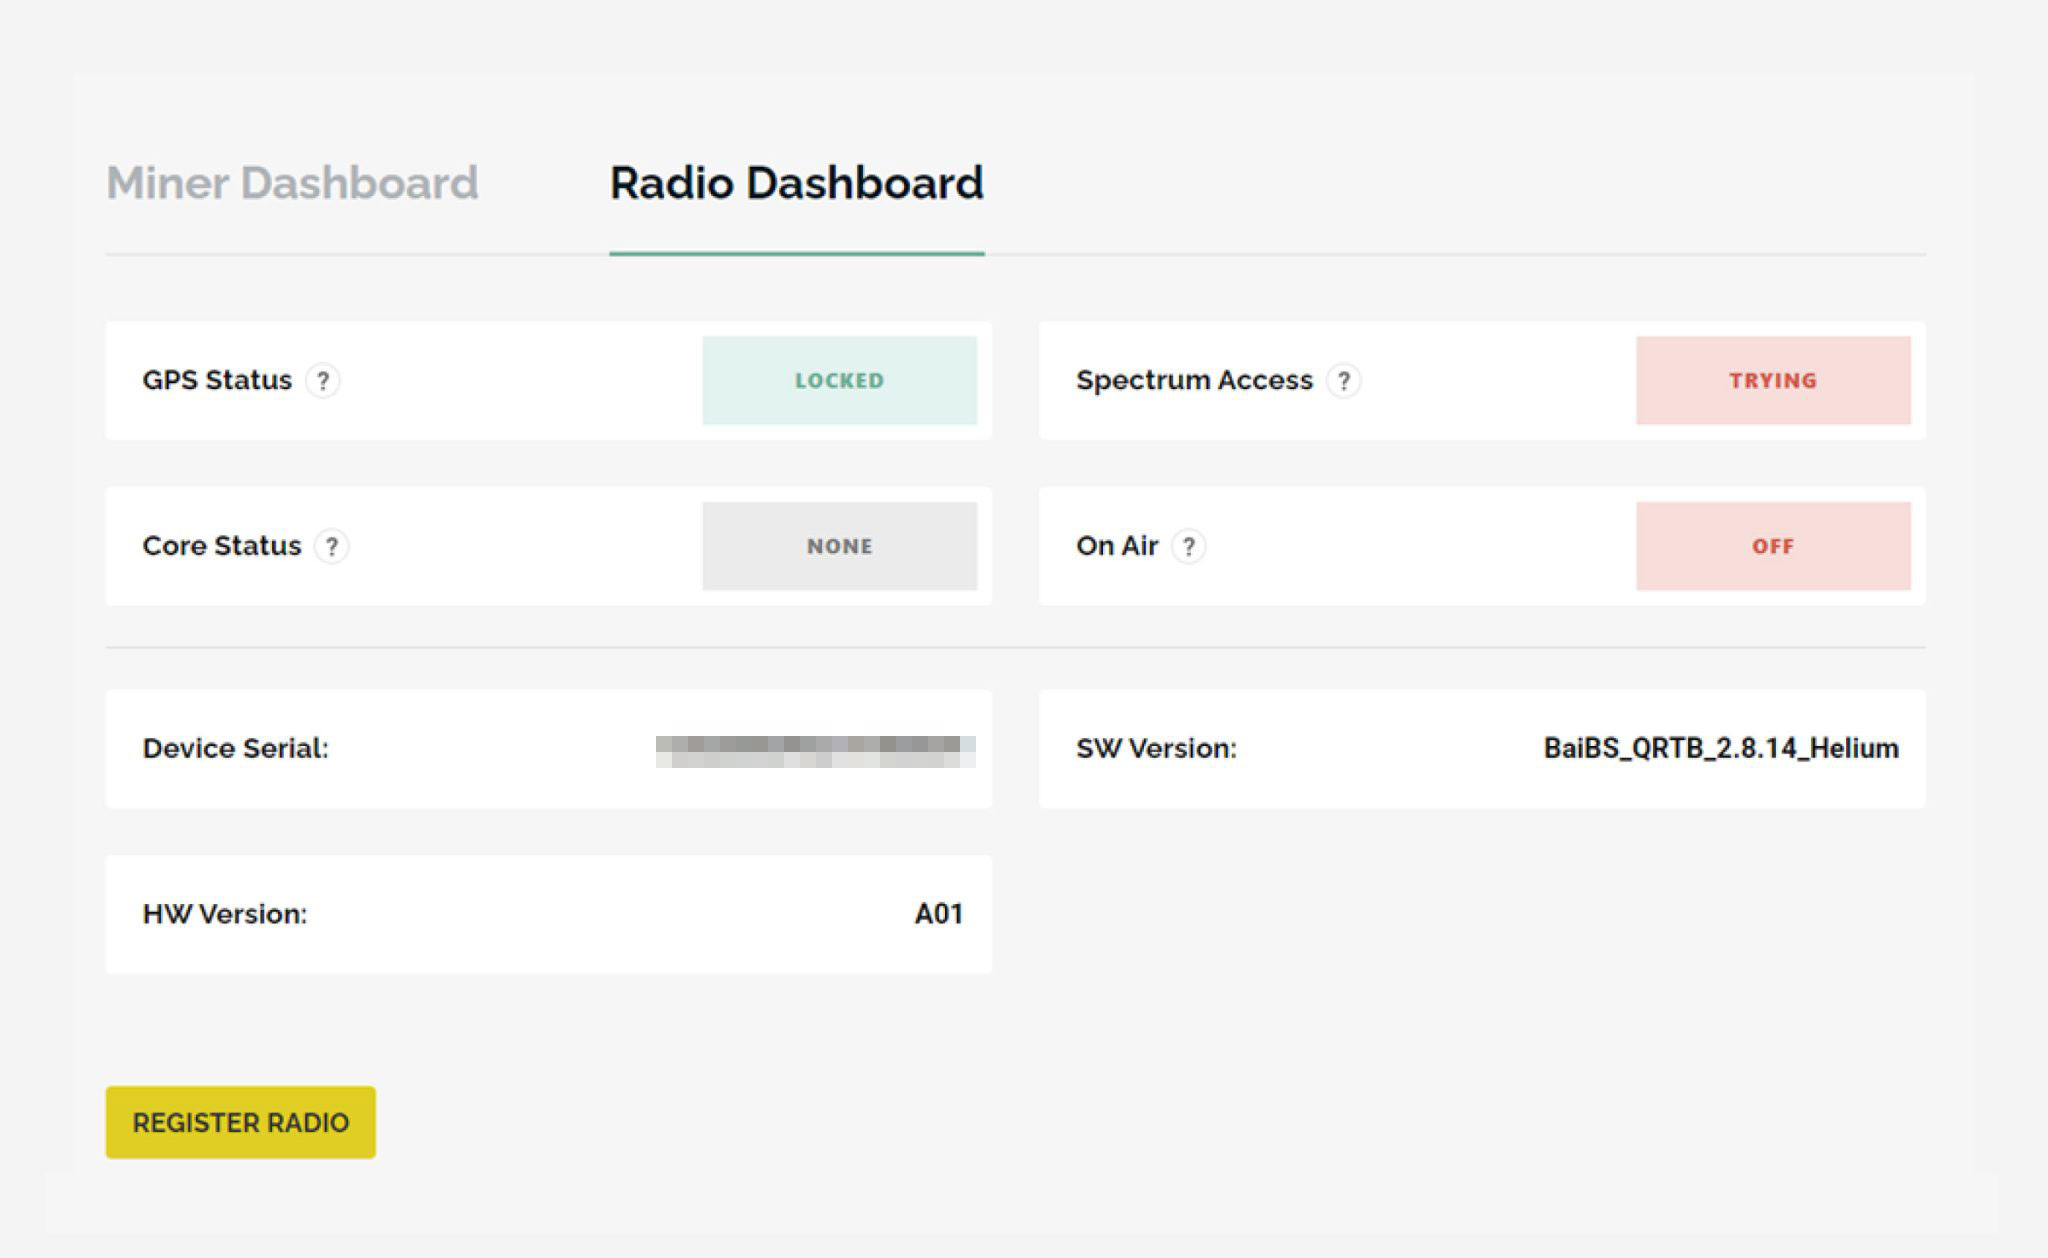
Step 3 - Verify Connectivity Status
- Using a device that is connected to the same network as the FreedomFi Gateway, connect to the Small Cell dashboard using http://freedomfi-gateway.local/
- “GPS Status” will be “trying” until the small cell finds enough satellites to connect to.
- “Spectrum Access” will be “trying” and “On Air” will be “off” until the small cell registration is submitted and approved.
Small Cell Outdoor Setup and Registration
For optimal performance, place your Outdoor Small Cell in a high location (recommended at least 20ft) where there are no obstructions. You want the device to have a clear line of sight for the best signal strength. CBRS signals have less range compared to LoRa signals. It can also be weakened or blocked by obstacles such as walls, trees, and buildings. For best data capture performance, point your Small Cell towards populated areas ( ex. colleges, parks, shopping centers, etc).
* The Outdoor Small Cell requires the below photos during installation for CPI approval.
- (2-4) photos of device height.
- (1) photo of Azimuth angle.
- (1) photo of Elevation angle.
- Street Address of installation.
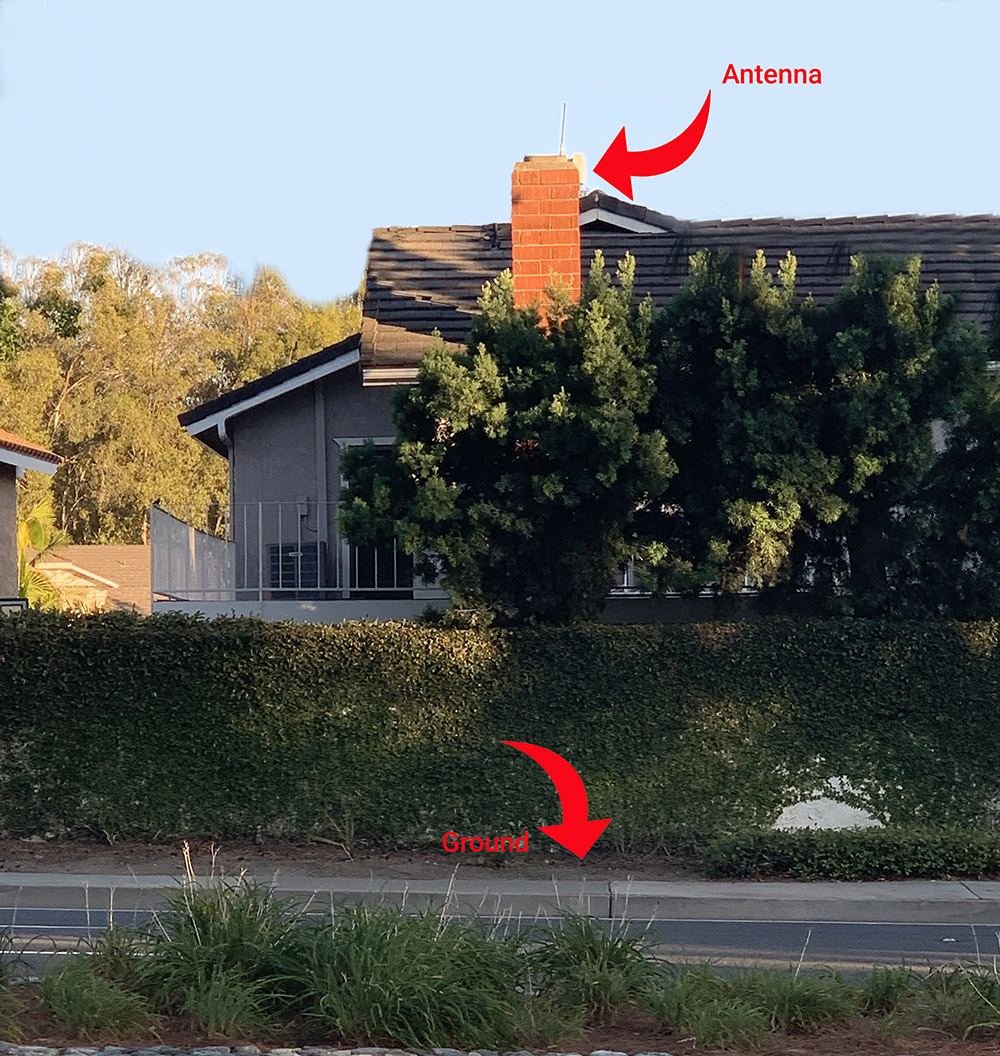
Step 4 - Recording Height
- Document the height of the installation and capture a photo of your installation.
- There are APPs on mobile devices that are capable of measuring heights by using the camera on your phone.
- You can also get the height of buildings by using Google Earth Pro..
- Your photo must include a view of the ground and the Small Cell device.
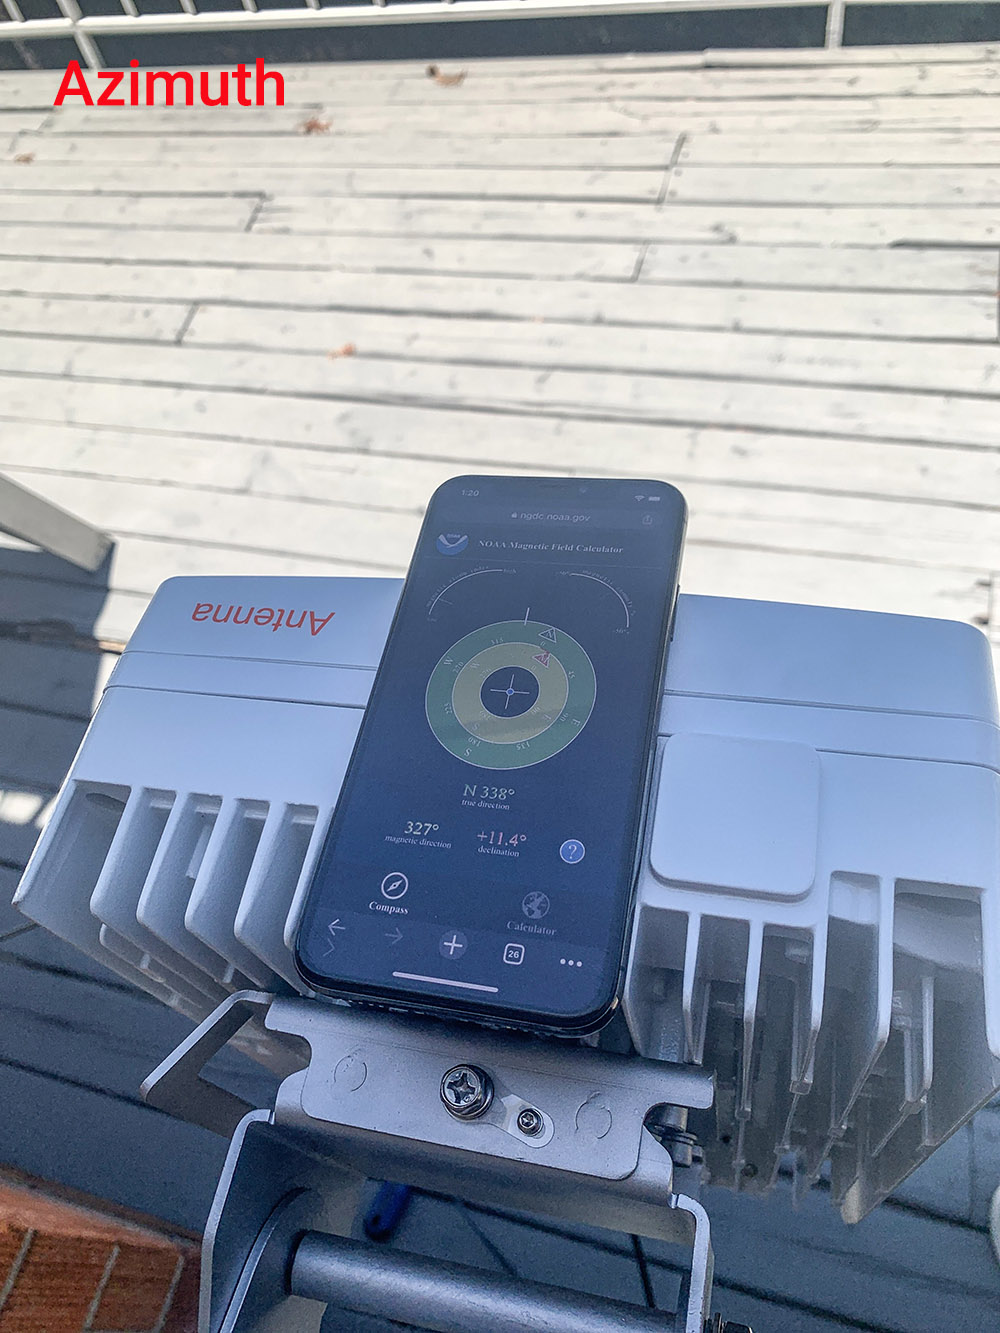
Step 5 - Recording Azimuth Angle
The azimuth angle is the compass direction in which the center of the antenna is pointing. To gather this information, use the NOOA Mobile Magnetic Field Calculator.
- Use the above link to access the NOA Mobile Magnetic Field Calculator.
- Make sure you are using the “Compass” feature from the bottom left corner.
- Place your phone on top of the Outdoor Small Cell.
- Point the TOP of your phone (the side that is placed to your ear during phone calls) to the same direction as your antenna.
- Take a picture of the compass direction.
Step 6 - Recording Elevation Angle
The elevation angle is the angle that your device is facing compared to the ground. The reference point is the middle of the antenna. There are APPS available to help measure this.
- Use the APP that is relevant to your phone.
- Place your phone on top of the Outdoor Small Cell.
- Take a picture of the elevation angle.

*Image above is using the “Measure” app on an iOS device.
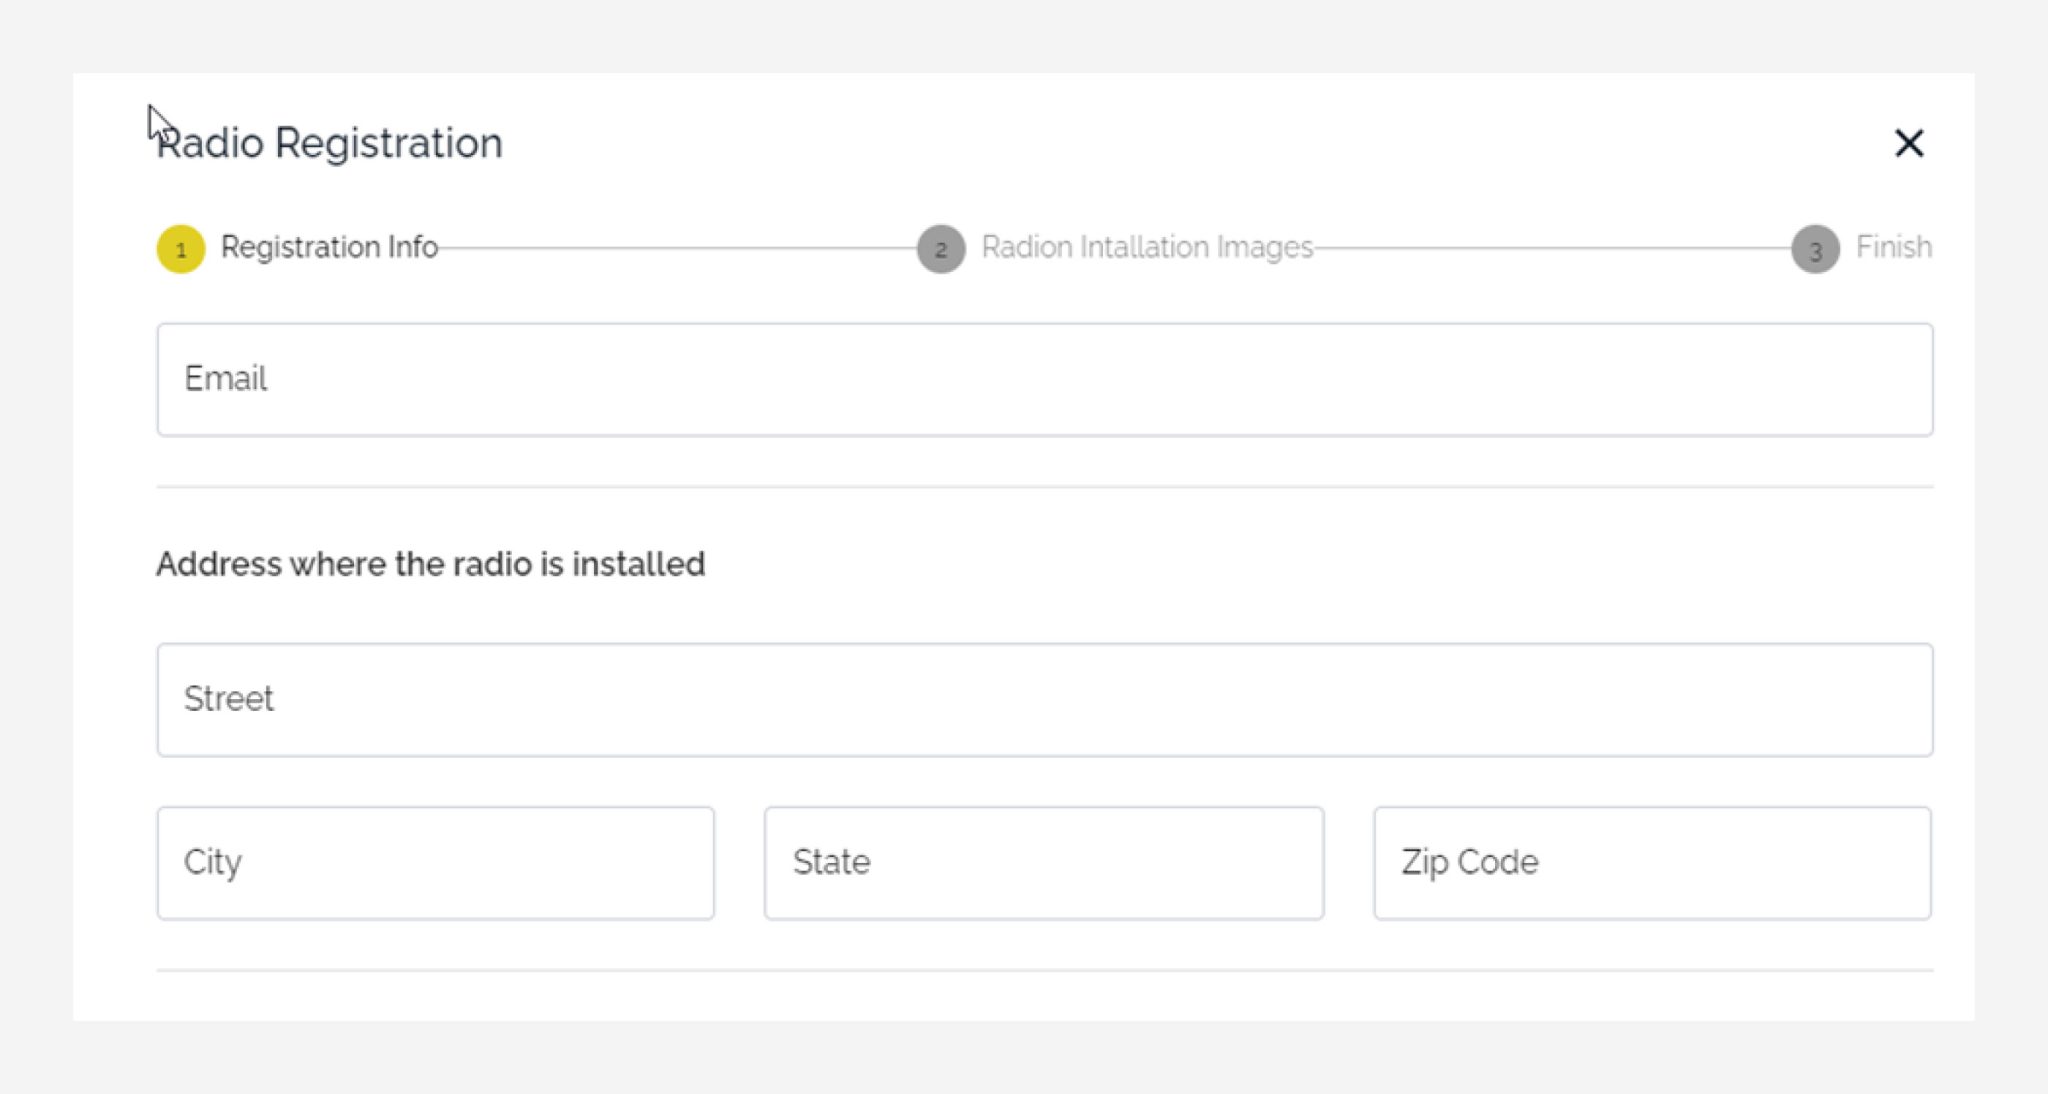
Step 7 - Registering the Outdoor Small Cell
After gathering the required information and photos, submit them for CPI approval.
- Using a device on the same network as your FreedomFi Gateway, access the Small Cell dashboard using: https://hotspots.hellohelium.com/auth/login/methods/helium-wallet
- Make sure you select the Small Cell you are submitting the photos for.
- Click “Register Small Cell” on the bottom left corner.
- Follow the instructions to fill out the form and photos.
- Submit the information and wait for approval. (Confirmation within 3 days).
Step 8 - Verify Small Cell Connectivity
After receiving CPI approval, check your Small Cell Dashboard and verify that all status are green. This confirms that your registration was done successfully.